
If you’ve ever utilized the Brita water filter for any period of duration, you’re aware that with time the water filter will turn dirty even though it can clean the water passing through it. The water filter you use to clean it, and this is something which you must not put off. How to disassemble Brita pitcher?
Contents
- 1 Then comes the question: How to disassemble brita pitcher?
- 2 How to take apart Brita pitcher?
- 3 Here are the details steps by steps How To Take Apart Brita Pitcher:
- 4 Frequently Asked Questions
- 4.1 What can be done to remove mold from a Brita pitcher?
- 4.2 Does a Brita pitcher with algae in it pose any health risks?
- 4.3 Does my Brita pitcher come apart?
- 4.4 How do you remove the inside of a Brita pitcher?
- 4.5 How do you clean a brita pitcher spigot?
- 4.6 Can Brita pitcher be taken apart?
- 4.7 How do you clean the inside of a Brita pitcher?
- 4.8 How do you get a Brita filter out of a pitcher?
- 4.9 How do you remove the top of a Brita?
- 5 Conclusion
Then comes the question: How to disassemble brita pitcher?
It is important to note that the Brita filter requires an additional tank that should be separated. The filter must be changed to a different screen if it hasn’t been done already. It’s a good idea to change Brita pitchers filters very frequently; else the filter could harbor bacteria and other harmful substances that can cause illness.
If you’re planning to maintain the screen the only thing you need to take care of to maintain it is change the screen. This is a easy step-by-step guide on the procedure of dismantling a Brita pitcher.
How to take apart Brita pitcher?

The normal Brita pitcher water to replace the filter each few months. The filter can provide an average of 40 gallons of drinking water prior to when it is required to be replaced. If you experience a variant, replace it each 6 months for approximately 120 gallon of drinking water. In the meantime, it should be functioning normally. Be aware that these figures reflect the normal software.
Here are the details steps by steps How To Take Apart Brita Pitcher:
Wash Lid and Reservoir
For the first step to disassemble to dismantling the Brita pitcher, you must first lift the lid off and scrub it clean. Following that, wash it under the sink with hot water, a dishwashing soap or detergent which is compatible with the standards. Clean it with a washcloth or sponge to ensure it is able to fit between the lids with a tight fit.

If there is an a filter change indicator electronic sensor located on the lid, which acts as an indicator for the filter Make sure that the lid is not submerged. People who have chrome-colored pitchers that have lids with push-ons can recognize the indicators of a pitcher that is dirty: small particles of residue and dirt get accumulated in time on the polished top.
If you like watching their reflections reflect in the sparkling surfaces of Instagr the Instagr can be quite a crowded location. It’s a problem that, in reality, can be solved easily.
Vinegar Mixture to clean: How To Take Apart Brita Pitcher
Mix one teaspoon of white vinegar with one tablespoon of water into the container of a mix. The mixture will be intended to get rid of any signs of mold. Also, you can use white colored vinegar for polishing chrome and get good outcomes.

If your lid is chrome and is covered with a thick layer of dirt, you can increase the amount of vinegar that you apply to the lid. Make use of a brush that’s not very abrasive. Slowly and delicately polish the lid until it’s clear.
The lid in an circular motion in order to eliminate the indicator streaks, and allow the lid to air dry. The lid isn’t required to use chrome polish or something like it.
Remove filter
The vinegar will disperse the filter cartridge, leaving behind a fresh and sparkling lid that is free of fingerprints. Take the filter off the product, and then set it aside. It is not necessary to wash the filter. If the filtering process demands the cleaning of the filter, you can do so by washing it in hot water.

To avoid further contamination by bacteria that cause mold, you should place the filter onto a surface which has had a thorough cleaning. Remove the filter clean it up thoroughly and look for signs.
Remove the container
If you own a pitcher take it off the vessel which holds cold tap or lukewarm water, and then place it into the sink. Take it out using an absorbent cloth soaked in some water that is lukewarm and gentle soap. Clean the exterior and interior of the holders and also the indicator and electronic device which hold the reservoir of the filter.
Clean the Reservoir
Do not wash in the dishwasher
The lid and the pitcher should be cleaned with a cloth, and stay clear of electronic devices with buttons. Make sure the pitcher is clean by washing it in warm soapy water. Brita plastic pitchers can’t resist the temptation of being filled with boiling water. So, it is not advisable to cleanse your Brita filter by putting them in the dishwasher.

Use gentle products to clean
In doing so, the pitcher to melt and then deform making it useless and cause the electrical device to fail. In the event that cleaning indicators are required make use of mild detergent and a soft cloth. For cleaning the jug apply a used dishwashing liquid or fluid that doesn’t require scrubs.

Dishwashing fluids of any kind, including mild detergents can be successfully used with this product. In lieu of steel wool or any other rough abrasives, employ a soft, smooth sponge or soft cloth. Examples of liquids for dishwashing which are soft and easy to apply are Dawn, Palmolive, and Joy.
Put the lid as well as the container into the water in a cup so that the lid stays. It’s best if you use mild dish soap first to clean each part in a separate manner, then you rinse each component with cold water.
Drying
It is possible to dry the lid of water pitcher and container using your hand or place them on a clothing rack. Make sure to use a towel that is totally dry when you’re drying the pitcher with your hands. Then flip it over, and put the pitcher in a drying rack, or dry towel placed on a flat area.

If that isn’t possible you can leave the lid as well as container to dry on the rack for at most up to 2 hours, or until they’re completely burned in the event that they are not, mold signs might reappear. In the event that you wash and dry your pot by using a towel could be a possibility that the warm water may contain some tiny fibers.
When you put any of the components into the jars make sure they’re hot. This can prevent development of mold within the containers. We recommend that you keep your components on a rack. If you’re short on time, make sure that there aren’t any stray fibres of fabric that remain within the product by removing them from the container with a towel made of paper instead of the use of a cloth.
Prepare a new filter
After you’ve removed the contents from the container and let it dry, you’ll have to create a fresh filter during the interim. You may find that you won’t need soak the Brita filter to wash it. The latest model of Brita Filter will not require the soak prior to the cleaning process, in contrast to earlier models.

Prior to cleaning, take the steps below:
- Prior to cleaning, go through the guidelines included with your cold water tap brita filters is in your home.
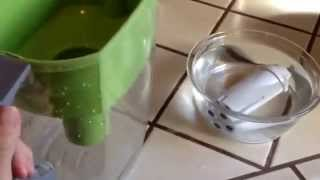
- Run cold water through an all-new Brita filter for fifteen seconds. Then, pour the water in a bowl.
- Install the lock onto the filter in order to ensure the filter is secured. You must read the instruction manual for your specific Brita filter model to determine the need to clean the filter using cold water.
Assemble the Pitcher
You think it’s been drained and your container is ready. The time is now to rebuild the pitcher in order you will be able to get delicious and great tasting water out of the Brita stream.

Tip:
It is suggested to do this at minimum twice. each indicator needs to be checked and cleared of carbon dust.
Pour the cold water to the edges of the jug, and then spread the filtered water around to get rid of any remaining dirt and heavy metals. This is the time to remove Carbon dust, often referred to as black specks, may be discovered in the water filters of the faucet as well as purifying it could lead to cleaner and more efficient drinking water.
When you are done, take a look whether the water coming from the tap is clean. There isn’t any carbon within the water, which makes it cleaner and more delicious tasting. The specific model of your Brita pitcher will tell you if you require some additional steps to rebuild the pitcher.
Frequently Asked Questions

What can be done to remove mold from a Brita pitcher?
Utilizing liquid detergent as well as hot water, wash the entire pitcher as well as its components. The cleaning solution made of white vinegar and water can remove the mould. If this doesn’t work, try a different trick, then try using watered down bleach. Clean the whole thing particularly the spout, and the housing with the brush.
Does a Brita pitcher with algae in it pose any health risks?
If you’re wondering if algae that is growing in the Brita filter could be harmful Consider the fact that algae are actually plants. There’s a good chance that’s true. The water that is contaminated by algae isn’t fit for consumption by humans. The reason for this is that some algae create toxins which can cause stomach discomfort as well as skin irritation, diarrhea as well as vomiting.
Does my Brita pitcher come apart?
Wash the pitcher, disassemble it and clean it thoroughly. It’s simple to take apart the lid of a Brita. Begin by removing the lid from the pitcher. Then, remove the filter, then put it back in the.
How do you remove the inside of a Brita pitcher?
How can you take the filter housing out of the tank? It is essential that the pitcher filter holder is fully refilled and then empty in its lowest point.
How do you clean a brita pitcher spigot?
Cleanse hands frequently with gentle detergents (not abrasive). Rinsing. The washing machine is not needed. Place the filter into the reservoir by placing the grooved brita filters housing at the one side of reservoir.
Can Brita pitcher be taken apart?
Yes, the Brita pitcher can be taken apart. The pitcher consists of several removable parts, including the lid, the reservoir, and the filter. These parts can be easily disassembled for cleaning and maintenance purposes. Taking apart the pitcher allows for thorough cleaning of each component, ensuring that the water is filtered effectively and the pitcher remains in good condition. It is important to follow the instructions provided by Brita to safely and properly dismantle the pitcher.
How do you clean the inside of a Brita pitcher?
To clean the inside of a Brita pitcher, start by removing the filter and discarding it if it is past its recommended lifespan. Then, fill the pitcher with a mixture of warm water and dish soap. Use a sponge or soft brush to scrub the inside of the pitcher, paying attention to any stains or residue. Rinse the pitcher thoroughly with clean water to remove any soapy residue. For stubborn stains or odors, you can use a mixture of water and white vinegar, letting it sit in the pitcher for a few hours before rinsing. It is important to regularly clean the pitcher to ensure the best-tasting water and to prevent the growth of bacteria.
How do you get a Brita filter out of a pitcher?
To get a Brita filter out of a pitcher, you can start by removing the lid or cover of the pitcher. Next, locate the filter compartment or slot where the filter is inserted. Depending on the design, there may be a latch or lock mechanism that needs to be released. Once released, carefully slide or pull out the filter from the compartment. It is important to handle the filter with care to avoid any potential spills or accidents. If you encounter any difficulties, referring to the user manual or contacting the manufacturer’s customer support can provide further guidance.
How do you remove the top of a Brita?
To remove the top of a Brita, you first need to locate the handle or grip on top of the lid. This is usually a small protrusion or a tab that can be easily grasped. Once you have identified the handle, firmly grip it with your fingers and apply downward pressure while twisting it counterclockwise. This combination of downward pressure and twisting motion will unlock the top from the base of the Brita pitcher. As you continue to twist, the top will gradually loosen and can be lifted off completely once it is completely detached from the base. It is important to note that some Brita models may have different mechanisms or designs, so it is always advisable to consult the user manual or specific instructions provided by the manufacturer for accurate guidance on removing the top.
Conclusion
We have provided you with instructions on how to disassemble a Brita pitcher. It’s easy to remove heavy metals like mercury, cadmium as well as other harmful contaminants yourself. It can also eliminate any other harmful substances. Also, it helps reduce the flavor and odor that is that is typically found in tap water. This can cause a lot of discomfort.
It has the capacity to absorb chlorine and causing an increase in the amount of chlorine in the warm water. It is possible that your brita pitcher water filter could have to be replaced often than normal based on the type of water that you are using.
As a result, you are assured that your water purifier will function at a high degree of effectiveness. In addition, if your water source has hard water the filter holder is likely to need to be replaced frequently.